Mark’s Concours Pages
Here are some of the experiences / lessons learned / stuff to share I’ve picked up. One of the best things about having a Concours is the community of owners. They are an informal group, many of who are affiliated with the Concours Owners Group. Two of the most prominent gathering spots are the original Concours forums over at the ZG/GTR Fanatics Forums and the COG Club Forums. Neither requires paid membership to participate but I’d encourage you to try a paid COG membership. There are lots of benefits, particularly to folks new to the Concours.
Table of Contents
Throttle and Choke Cable Routings
Headlight Assembly Cross Reference
Kawasaki Tank Bag Instructions
California Emissions Hose Routing
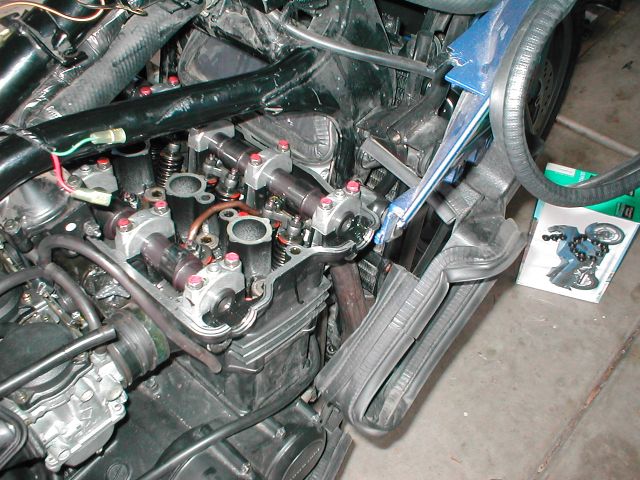
They seem pretty common. They don’t seem to be a problem for the most part, as long as they don’t get worse over time. My other Kaw had cam zits too that never got worse. Some looks at of my pitted cam:
Here’s a spreadsheet I made for 1) tracking where I'm at and 2) recording the results while doing valve adjustments. It also has some other related info and reminders.
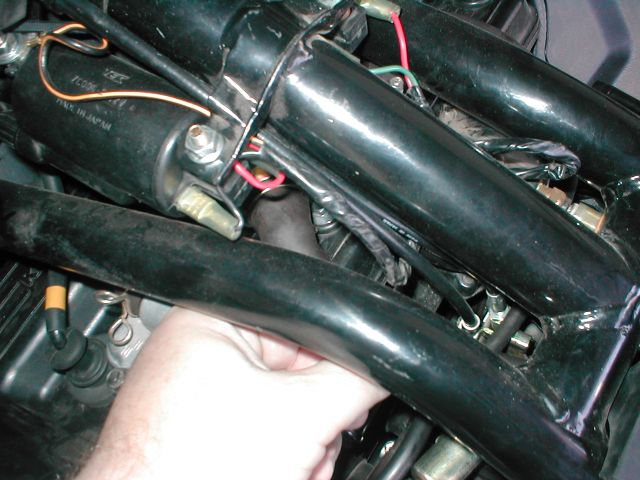
Here are some pictures of how I routed my throttle cables to get rid of the throttle binding problems I had. Your route may need to vary due to any number of differences. It works for me. If you try it make sure it works for you as a stuck throttle could ruin your whole day.
Top down look into where the cables hook onto the carbs
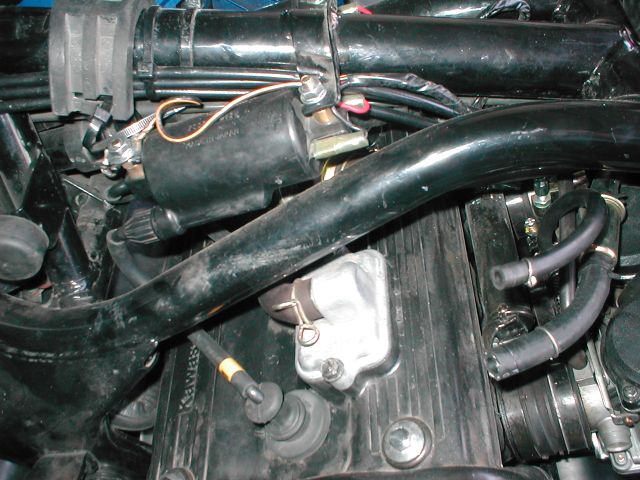
Looking at where the cables come from the carbs to behind the coil
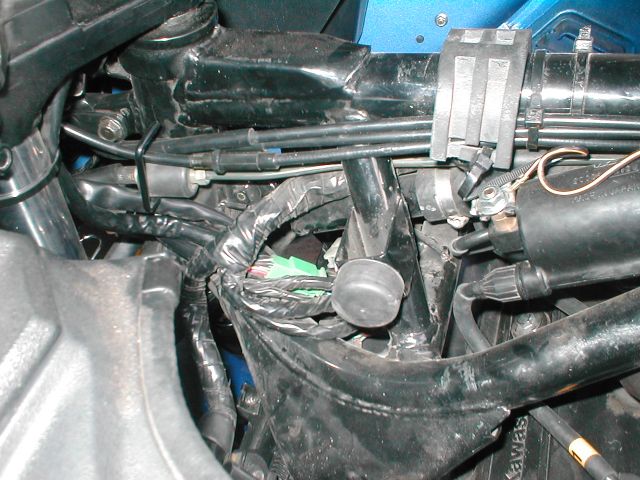
After clearing the coil, it goes forward and under the fairing stay
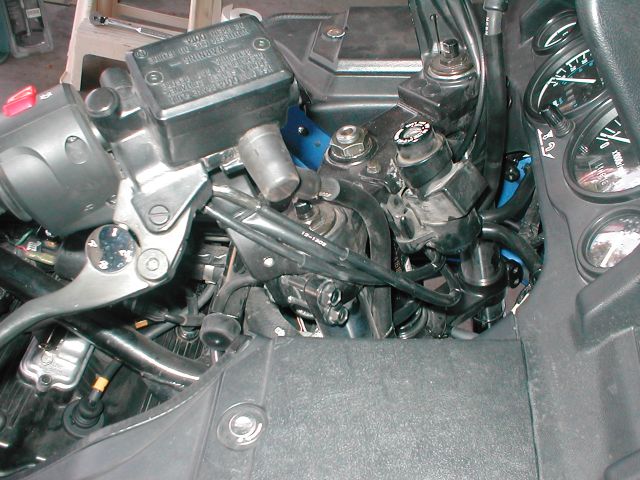
A view just forward of the steering head from the left grip area
Looking ahead of the steering head from the right grip
Not all bikes are equal. This one seemed to have lots of little niggling problems that a couple of Phoenix dealers and PO (Previous Owner) couldn’t resolve. Being cheap, having decent troubleshooting abilities, and being able to wrench things into submission without quite knowing what I’m doing, I bought it from him. For those with a morbid curiosity, here's a list of things I've had to adjust, repair, or replace since I bought the Connie in October 2002.
Brian Moody has a table with RPMs, speed and gearing, and it's pretty good. I wanted something little different, with charts, data in the metric system, and the ability to play with the numbers. If I can find a torque and horsepower plot or dataset, I'll add them in. Be interesting to me anyway.
RPM Table in HTML Tables and Graphics
The original <?> KotTL, Bob Held, stopped updating it when he changed bikes. A long time ago I needed tires and wanted to update the info so I took it over. It's changed some over the years. For one, it's now on Google Docs (hope that URL is stable) so it can be continuously updated by you, the Concours owners! The 'main' hosting will be here, but if there are changes you'd like to make feel free to give it a try. If they're extensive changes please copy the original data into a new sheet so the original doesn't get messed up!
Concours Tire List in MS Excel format
Concours Tire List in HTML format
If you check the “List of Fixes“ you'll see that mucking with the carbs tops the list of stuff I've been fighting. Here's some photos from the latest battles.
This is how I keep track of the screws as they come out of the fairing.
- Take a photo of the bike in your favorite color and print it out heading left and right. I think mine came from the Kawasaki web pages?
- Tape it to a small cardboard box (clear packing tape) to attach it and laminate it. Tape should cover all of it when you're done.
- Cut slots in the box/picture where the screws go
- Push the screws through the slots as you remove 'em ;)
Here's a lousy picture of it.
Look to the middle, far right.
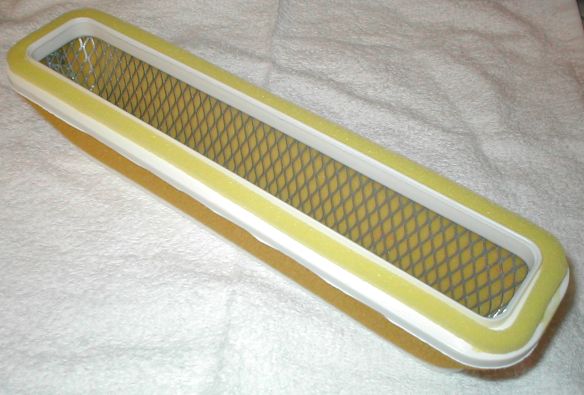
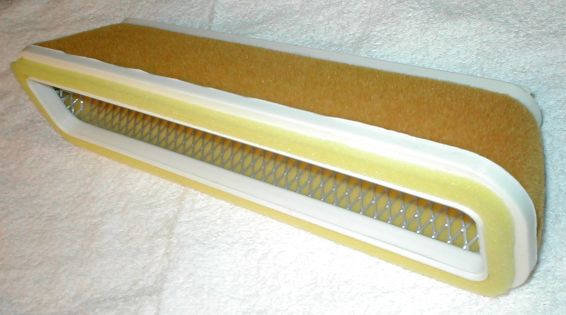
The EMGO part number 12-92910 filter looks very similar to the one I replaced during the first <?> air filter replacement. If the one I got with the bike was the original, I think they either make the OEM filter or a pretty decent copy. Here's a view of it in the box, from the bottom, top, and side.
A word of advice. The fit into the opening into the upper air box is very tight around the top of the filter. I couldn't get a UNI (NU-2359) to fit, even after significant wiggling. I was disappointed, as the construction of UNI's filter looks VERY good. UNI was great when I asked them questions about the fit problems I was having too, and offered to take the filter back. I returned it to the retailer I purchased it from and got the EMGO. Being fair, even the EMGO is difficult to align properly so Vrooomm might have an extra tight air box opening. When replacing your filter, test fit it BEFORE you oil it. That way if there are problems, it's an easy return.
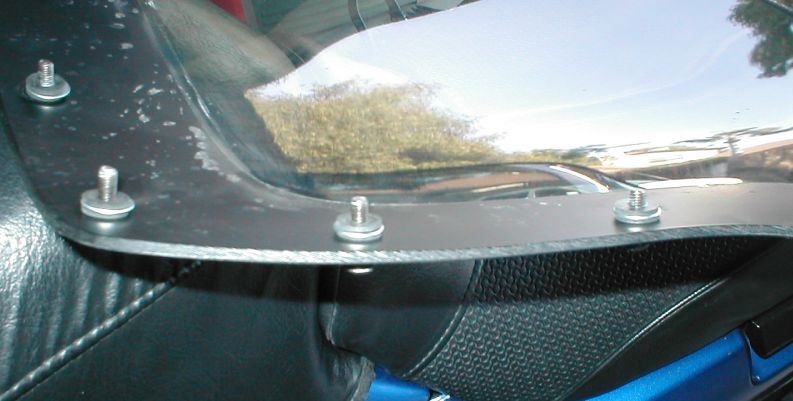
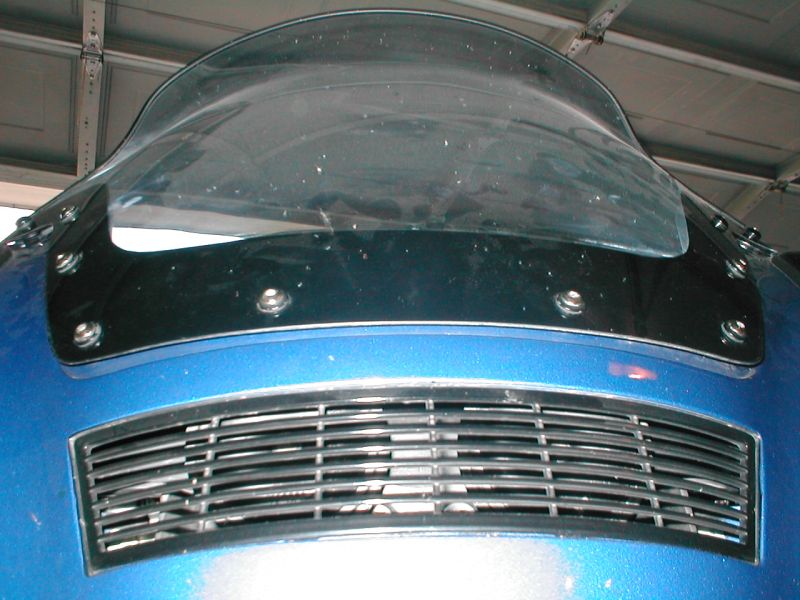
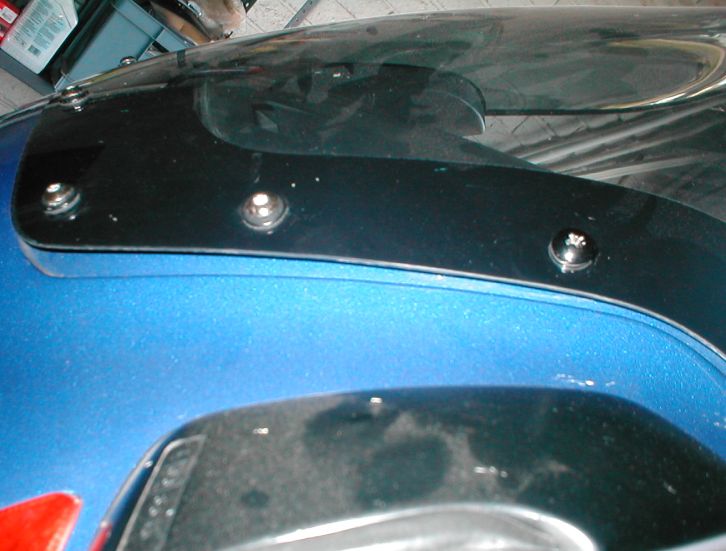
I was poking around on Google, mining for ideas to fix the buffeting for cheap on Vrooomm. I ran across this F650 group FAQ. They had some luck shimming their windshields out a little. The idea being that if some air gets in behind the shield, maybe something wonderful will happen. For some it did! Not being one to take a good (cheap & easy) idea and leave it be, I decided to give it a go. I built my washer stack out of 3/32” neopreme washer “bread” and a metal washer “meat”. So far so good. Installed the windshield. Had to use longer screws on the top screws since the screen was too far away. Looking at the gap at the bottom and sides, it looked promising! Took a ride, and nothing. Maybe MORE buffeting. Why? Even tho' the screen was farther away at the bottom, but the time it had reached the top mounting screws, the size had be distorted enough that there wasn't any room for air to get past. I've reinstalled the shield with the normal setup.
If you break a headlight, there are several options. Last I looked Ron Ayers had new ones for ~$200. There's a dual lamp setup available from Murph's Kits for $475 (FEB2005). That's a bit spendy for my tastes. There's the local junk yard. Then there's the world's yard sale, eBay. I got one there for ~$17, shipped! How? Look at other bikes in addition to the Concours. Since Connie is a parts bin bike, there are several models that share parts, including the headlight assembly, part #23007-1132. Among them are 85-87 ZX600's, 87-88 ZX1000's, and 89-90 ZX10's. The EX500's look very close, but they are a different part number. If someone has tried it, let me know and I'll add the info.
I looked on Kawasaki's web page for the installation instructions to share the link with someone. Couldn't find it. Here it is.
Guy Young (COG President & Tech Director when this was written – July 2005) put out a call for pictures of the routing of these hoses since the pictures in the manual aren't very descriptive. Here's my go at it.
It's been coming up on the MicaPeak dot com COG email list quite a bit lately. I modeled it from a procedure that was on an old COG web page after it was replaced with the Super Secret Kawasaki Concours Pre-Delivery Dealer Won't Check It List. That’s all ancient history by web standards, but I missed the old rotor tweaking page. I finally got off my, er, chair and took a couple photos. Here's a quickie to how it's done.
Bryan Moody had to drop his compiled parts list, so I’m giving it a go. The original is still over on web.archive.org, but here is the updated copy in Excel and HTML formats.